Before I weld in the new floor pan I needed to fix a couple rusty sections of the firewall.

Wednesday, December 21, 2011
Thursday, December 15, 2011
Finished fitting the kick panel
Yesterday I finished fitting the patch for the passenger side kick panel. I also bent over the lip of the floor patch panel where it meets the firewall. The floor panel was stamped with an angled edge so it doesn't quite meet up with the firewall at the far right edge. I'm going to have to make a small piece to fit in there.


Sunday, December 4, 2011
Finished fitting the floor pan patch panel
Today I finished fitting the floor pan patch panel. To hold it in place while I fit the other panels I screwed it down with some self-tapping metal screws. I'm starting on fitting the passenger side kick panel.


Friday, December 2, 2011
Rust repair
I started on some rust repair this week. I am replacing some rusted out areas of the floor, kick panels, door supports and rockers. Before cutting I braced the hinge side of the pillar with some scrap material I had laying around the garage so it wouldn't move and mess up the door alignment.


Sunday, October 16, 2011
Engine install video
Time lapse video of me installing the engine, shifter and parking brake handle.
Tuesday, October 11, 2011
Test fit for the engine and transmission

Monday, August 22, 2011
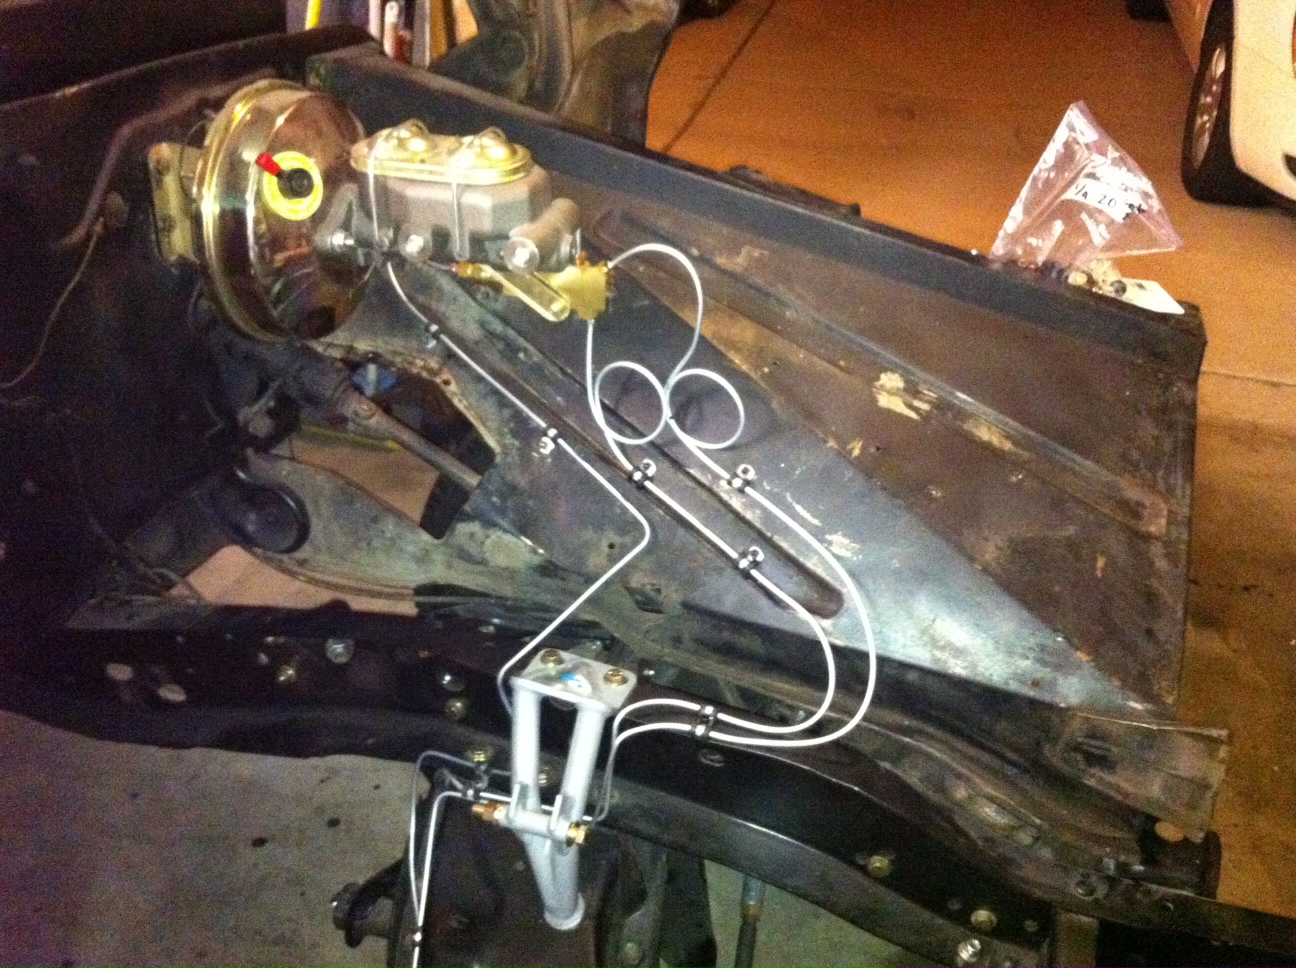
Finished the brake lines


Saturday, July 30, 2011


Monday, July 11, 2011
Assembling the wood bed
I made a time lapse video of me assembling the wood bed on my truck. One tip I have to make the assembly easier is to use blue painters tape to hold down the carriage bolts while you thread on the nut from the bottom.
Here is the finished bed.

Here is the finished bed.

Sunday, June 26, 2011
Painting the boards for the truck bed

Tuesday, June 14, 2011
Bracket for parking brake lever
I made some measurements and I determined that my new transmission mounted parking brake lever was going to be too far forward when it is mounted in the truck. I made a steel bracket to move the lever back and it allowed me to mount the parking brake cable bracket as well.


Sunday, May 29, 2011
Manual transmission cross-member
While researching motor mounts and perches I ran across some information about cross-members for manual transmission trucks. I knew my truck had been a manual at some point in the past and it turns out my truck still had the old manual transmission cross-member. It isn't needed because my truck is now an automatic and the manual trans cross-member serves no structural purpose. It just gets in the way of exhaust and makes installing the engine/auto trans more difficult. I decided to remove it before dropping in the new engine and trans. It took about four hours of careful cutting and grinding to get it out.
 |  |  |
Monday, May 23, 2011
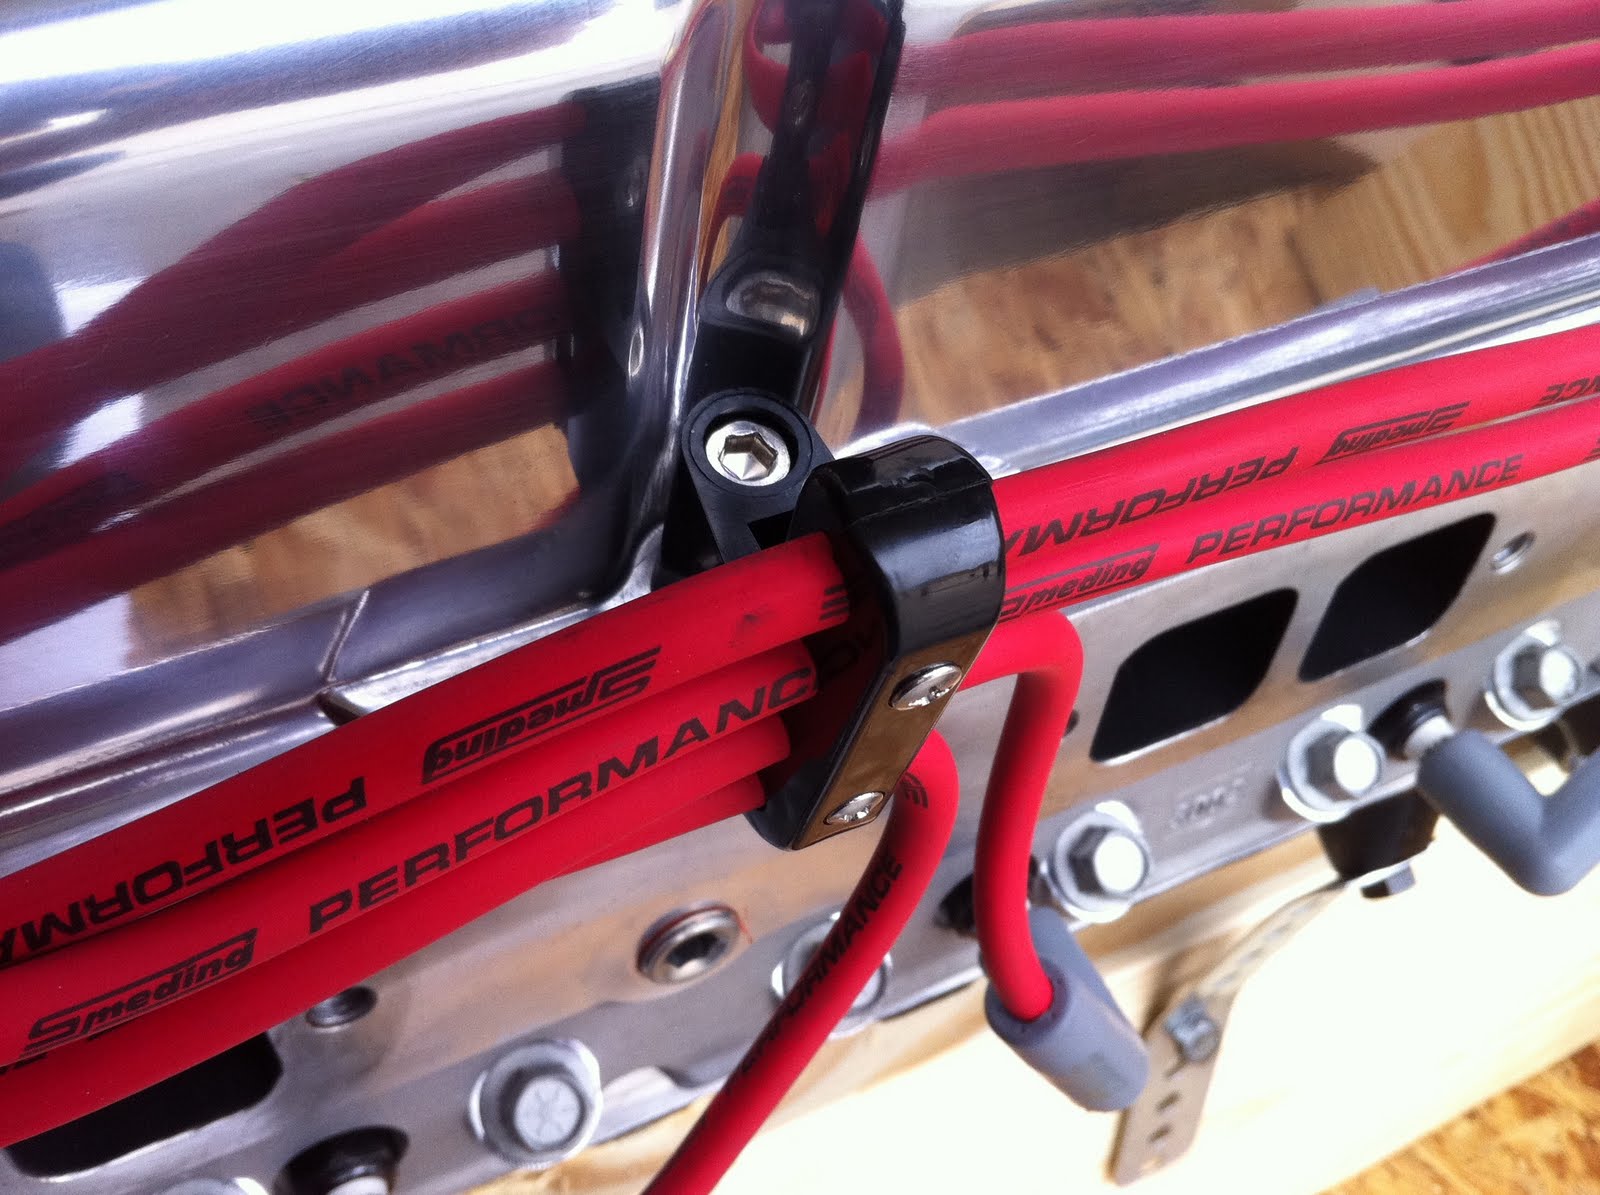
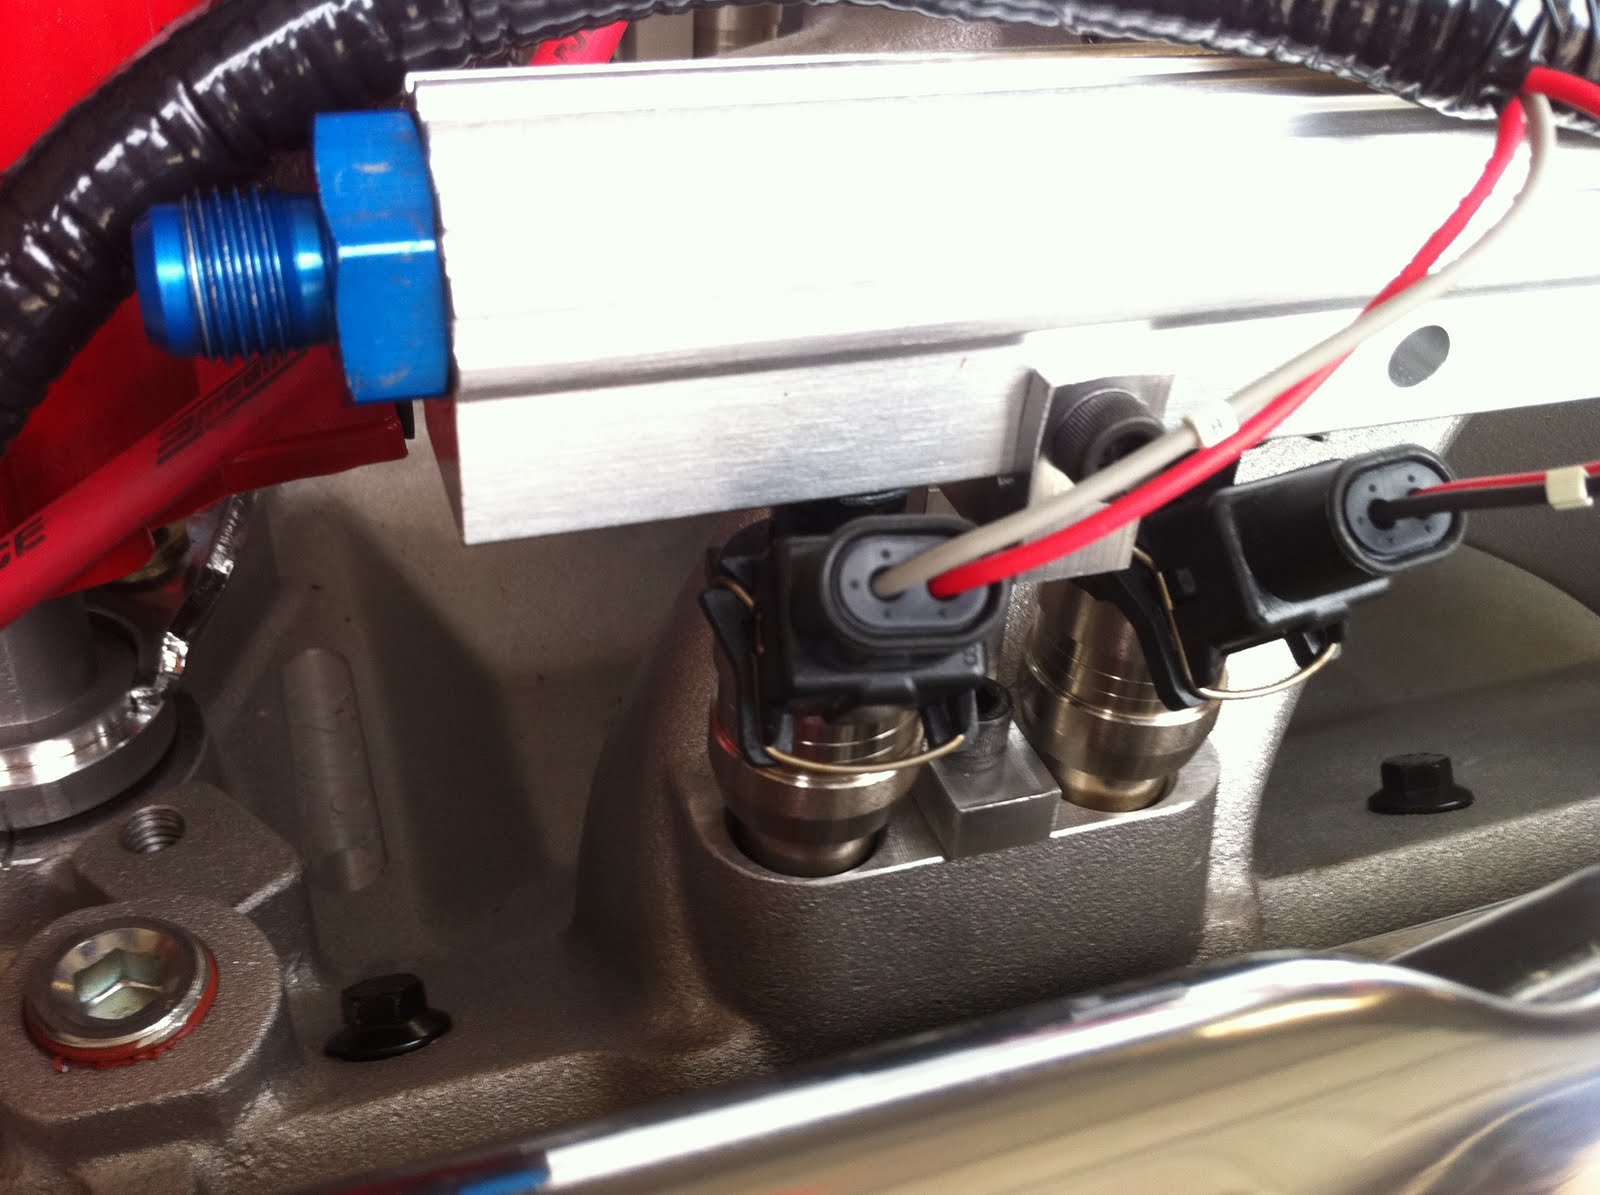
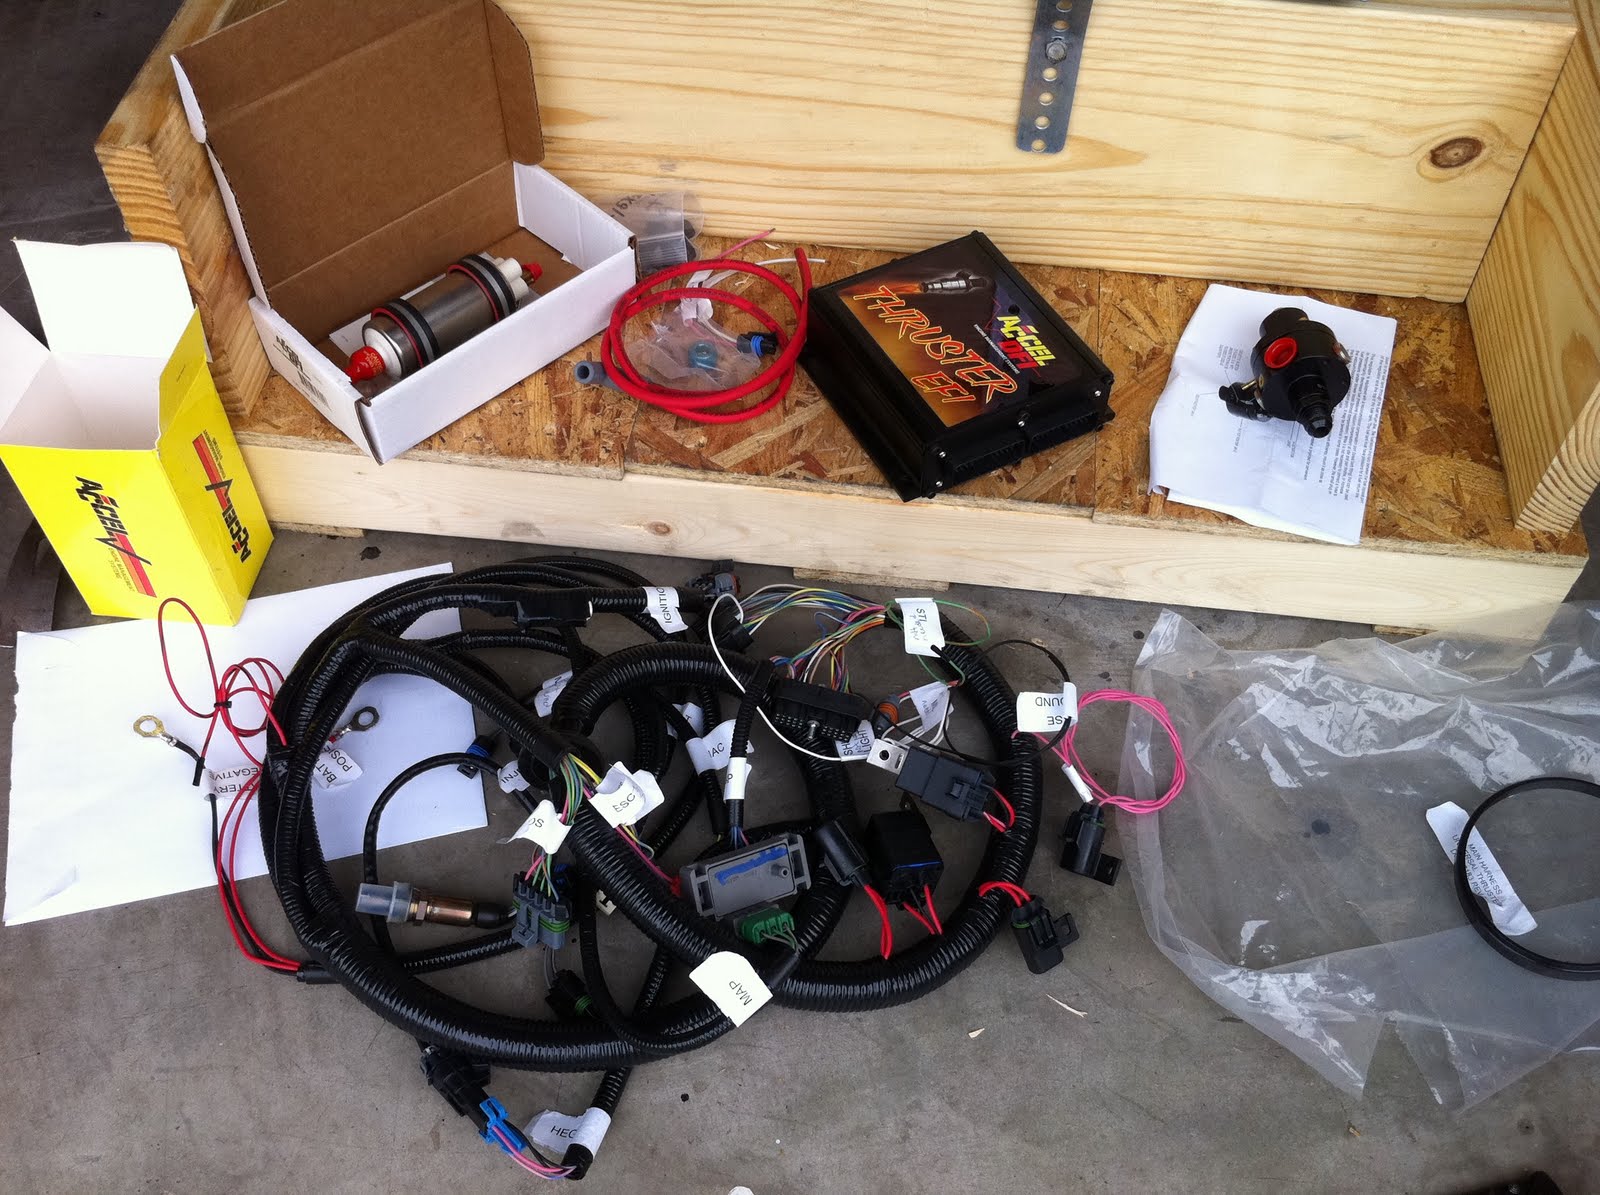
More engine pictures
Man this thing is beautiful. It came with some nice stuff that I wasn't expecting like the braided line connecting the fuel rails and the billet fuel regulator. The ECU box is much bigger than I was expecting. I'll have to find a spot under the dash for it. The wiring harness looks a little intimidating but every connector is labeled and can only plug into one spot.
 |  |
 |  |


My engine has arrived
My engine was just delivered! Cristy sent this picture to torture me. Man I can't wait to get home from work and open that crate. I think I might be coming down with something... cough, cough...

Thursday, May 19, 2011
Got my transmission today
UPS Freight dropped off my transmission today. I had a bit of an argument with Summit Racing about the delivery though. I paid for 'delivery to my door' shipping but it turns out what Summit Racing means by 'delivery to your door' is really a big rig trailer six feet off the ground out in the street in front of your house. When I called the UPS freight office to schedule the delivery I asked if they were coming with a lift gate truck. They said no and it would be an additional $135 bucks if I needed a lift gate. So I called Summit and asked why the trans wasn't coming on a lift gate. The customer service person then informed me what 'delivery to your door' really meant. I informed him that I thought that was one of the stupidest things I have ever heard in my life. He begrudgingly agreed and made an exception "just this one time" to cover the cost of the lift gate truck.
I got it unpacked and started test fitting the shifter and the parking brake lever.


Wednesday, May 18, 2011
Headers arrived yesterday

Monday, May 16, 2011
Update on my engine
My engine builder (Smeding Performance) just called to tell me they finished the engine and ran it on the dyno. The dyno results were 404HP and 446ft/lbs of torque! Quite a bit better than the advertised 370HP and 430ft/lbs. Mr. Kim joked it would be $50 bucks per HP for the extra. They are crating it up and it should be on a truck in a few days. Man I need to get the bed mounted back on the truck to make room for all the parts that are going to be showing up soon.


Wednesday, May 11, 2011
Front shock brackets


Tubular motor perches from CPP
Here some pics of the CPP motor perches installed. They are supposed to give more clearance for headers and plumbing. They only mount in the forward mounting holes which brings the engine forward 4". I have to recheck my measurements for the water pump and electric fan. I think I will have to go with a short water pump and slim fan.


More parts from Classic Performance

Tuesday, May 3, 2011

Friday, April 22, 2011
Front sway bar install

Subscribe to:
Posts (Atom)